We’re excited for you to explore the new City Parks Alliance Member Portal. Below you will find instructions for how to log in, locate the membership management tool, and update the members on your account, and more. If you need additional help, please contact [email protected].
You have two options to access the log-in page:
OR
From the City Parks Alliance Member Portal homepage, scroll down and locate the tile that contains your Membership information, on the left side of the screen.
Click on the “Manage Plan” button in the lower right.
If you do not have this button, you do not have permissions to update membership for your organization. Please contact your organization’s membership Owner or email us at [email protected] for more assistance.
Begin at the Manage Membership Tool page.
You have created a new member.
Begin at the Manage Membership Tool page.
Begin at the Manage Membership Tool page.
You have assigned a license to an existing contact.
Begin at the Manage Membership Tool page.
You can remove a license from an existing member.
Please note, only Account Owners can renew or upgrade memberships. To change the Account Owner for an organization, please email [email protected] with your request.
Membership renewal can only be done within 60 days of expiration. To renew or upgrade outside of the window, please email [email protected].
To renew, when logged in to the portal homepage, click “Manage Plan.” Or from your icon, click “Membership Details.” Your current membership subscription will be displayed, including expiration date, membership level, and the number of seats included in your membership.
You can enable automatic renewals if payment is made with ACH or a credit card. The card on file will be automatically charged.
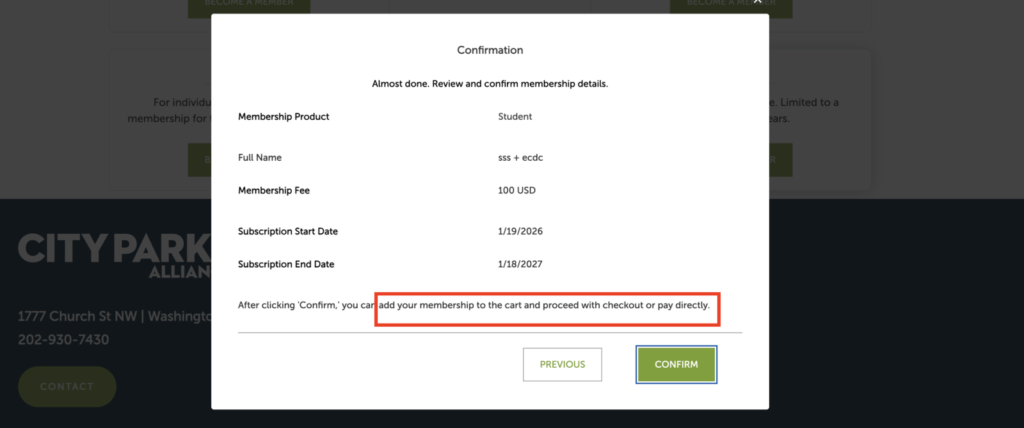
Click the “Renew” button to renew your membership at the current level. You can also “Upgrade” within the renewal period. There will be a confirmation page to proceed with your renewal/upgrade. You can then choose to pay immediately with a credit card or ACH, or add it to your cart if you require an invoice.
To pay by invoice, click to “Confirm.”
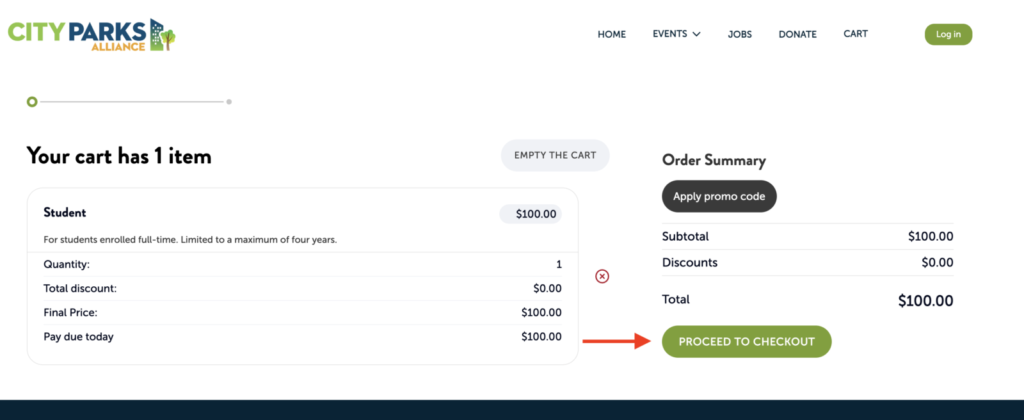
Once it is added to your account, proceed to checkout.
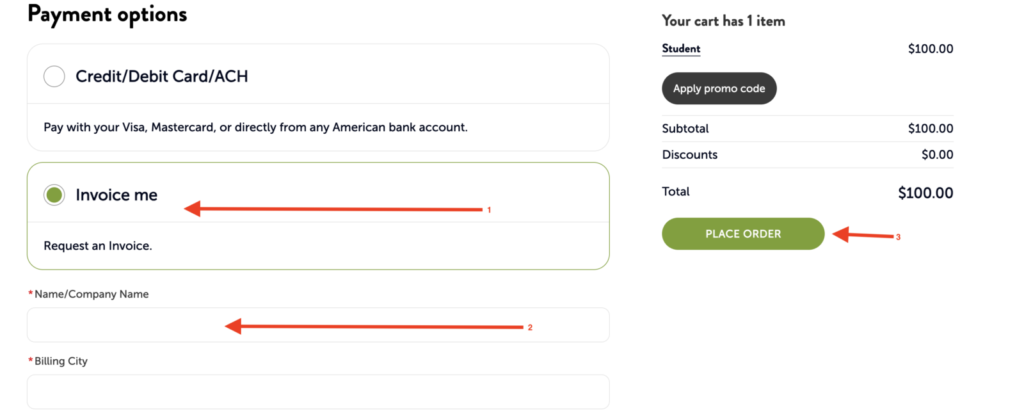
Then select the payment option for an invoice. Add the company name for an organizational membership and then place your order. The invoice will be sent to your email address as a PDF and can be printed.
To make payment on a portal invoice, you can log on and pay by credit card or ACH. You can also pay using the link in your email for the invoice. To pay by check, you can mail a copy of your invoice and a check to our address below. Please note that your membership is not updated until it has cleared our internal process and may take longer.
City Parks Alliance
1777 Church Street, NW
Washington, DC 20036